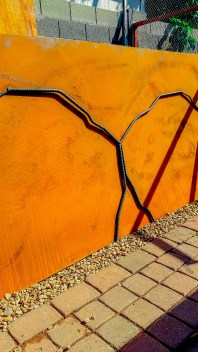
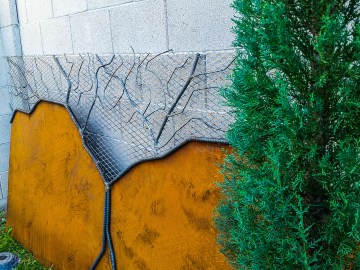
Here is our latest project, in which I really got to show off some creative, artistic vision. A customer approached me, wanting to replace a rotting wooden trellis pool pump cover. For his new cover, he wanted something one of a kind, to fit with his artsy, contemporary home ( Air Bnb Link ). Here are some of the pictures of the process! I will post some final pictures when the landscaping has been finished!
Gallery
Mailbox Stand
Past projects
Brackets
A friend of mine needed some “aged” brackets for a table and thought this would be a fun project to undertake!
Here is my blog style gallery!
I started with a 1-1/2″ piece of flat strap (left) and cut 4 pieces at 8-1/4″ each, and ground them down so just the steel was exposed.
I then clamped it down and proceeded to hammer it down with three different sized ball ping hammers to give it that “aged / hammered” look. We both took turns swinging away at the steel, creating craters both big and small, and eventually ended up with steel that looked like this!
Mental note:
When attacking this task, do not leave your beer on the table you are beating, you will ultimately end up with a fallen comrade (left) 🙁
From here we need to grind down the edges to make it look “eaten”.
Once we have our Strip, we can clamp it down
and hammer one end down on a straight edge,
giving us a nice 90degree angle
and you’re left with something like this!
This is what the finished product yielded. Turned out pretty nice!!
Castle Gate 1
This is one of the first “art”-sy gates I built. I knew I wanted something that felt like it was part of an old medieval castle. Perhaps my recent visit to England inspired me to get up and make them. I knew PorterBarnWood had old reclaimed barn wood I could use, and i figured I would have to age the steel myself. I wanted it to look like it had been through some rough times
I kept calling my dad, and had a hard time making decisions without him there. When I did call him, he would just listen to what I said and ask me which I thought was best. I guess hearing myself validate my ideas was all I needed to make sure I felt it was a good decision, and he was great at forcing me to make the decision. I spent a lot of time doing this gate, as it was a concept in my head, and first of its kind.
I spent hours, banging and grinding steel to give it that custom AGED look, custom made the handles, and let it spend some time rusting, by spraying it down with water every couple days until it really got going. Then I would clean it off from time to time, allowing the rust to spread and color the metal nicely. After the aging process finished, a nice coat of rustoleum and Shellac sealed the deal.
Then it was on to gate two! Check out the Gallery hereCastle Gate 2
My dad helped start this project, but then passed away in the middle of finishing this project. Installing this was a tough, yet at the same time, awesome moment. I still heard him talking to me while welding, and doing stuff with this gate. We laughed and joked like we normally did, and he was still telling me all the things that I was doing wrong. It was tough, but that was when I knew that he and I would always be making stuff together, from now on!
We decided to keep the wood we got from PorterBarnwood natural looking, (no color stain) to keep that grey shade from the PA hemlock, that once was a barn. Made another handle, the same as the other gate, for a little continuity. This project had a lot of love, hardship, pain, and anger put into it and I think it came out looking pretty awesome.
Next fun personal project is the RV gate…